It is a gorgeous day to celebrate The Silver Night. Oh yes, good Silver Night to you, dear friends.
This is a holiday all about snuggling up and reading with good food and tea and with a possibly cantankerous but certainly charming tengu. (Bonus points if you put out seed and nuts for the crows; they thoroughly love that! And if you’ve read Wind Across the Silver Blade, you know why that might be significant.)
As our third holiday in the 2023 Fantasy Romance Holiday Calendar, it is a great pleasure to welcome Catharine Glen and her sweetly passionate story of soul mates in a medieval Japanese fantasyscape.
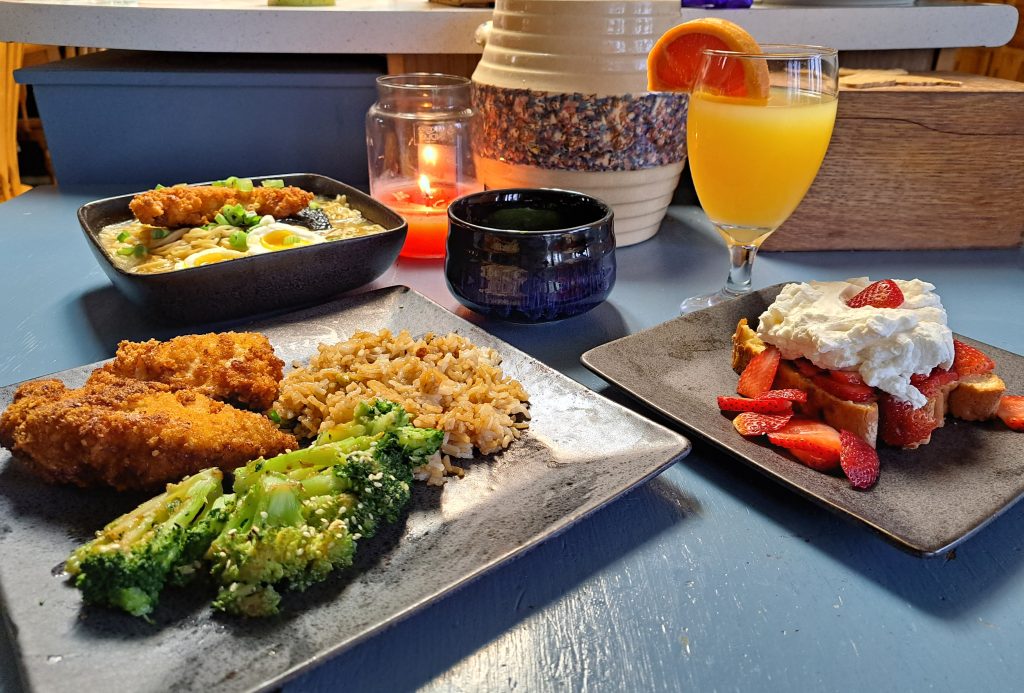
This tasty meal was inspired by some of the Japanese culture and what I guessed the characters might enjoy. You’ll have to let me know what you think. (The strawberry shortcake was especially fun to test out.)
Are you ready?
Let’s dive in!
Miki’s Magnificent Miso Ramen with Soft Boiled Eggs (To Be Served on Cold Nights With Good Stories)
If anyone knows how to cook up a magnificent pot of ramen, I bet it’s Miki. And this is something I imagine her serving, especially on a cold rainy night.
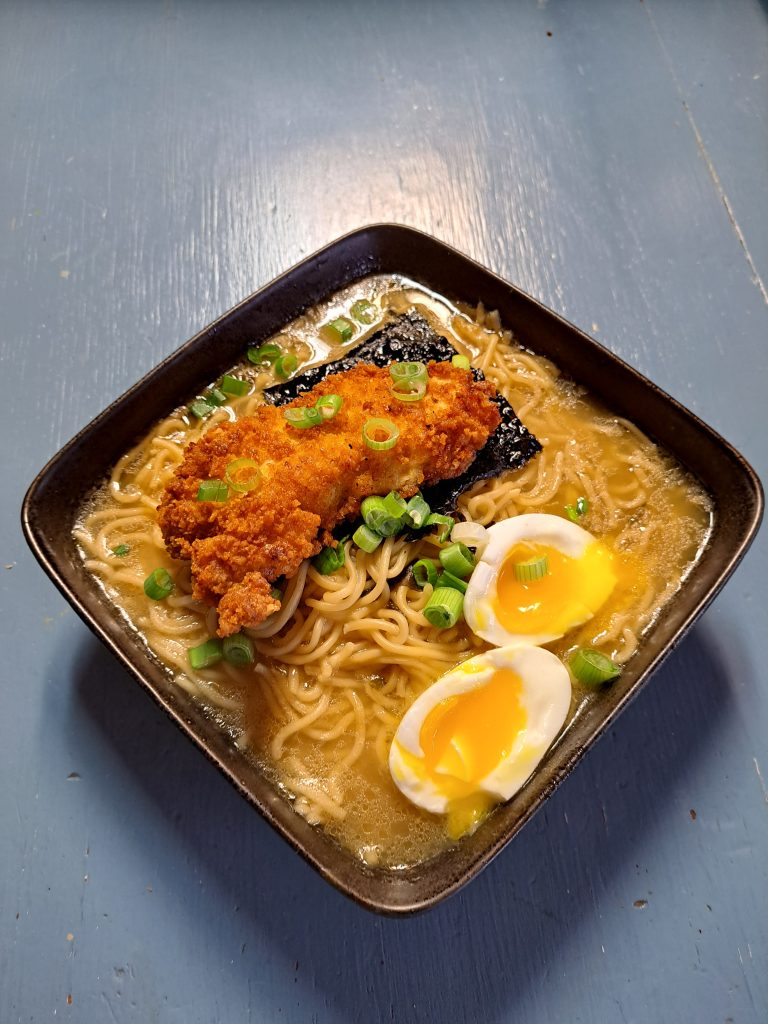
A small note for this recipe. There are some tasty gluten-free ramen noodles out there. The picture here features some Meister gluten free ramen. Taste wise, it is a bit distinct but not bad. (And the savory miso taste makes it much harder to notice.) The main difference I have seen is that they seem to lose their crimped form a bit faster. That said, my favorite brand thus far for gluten-free is the Miracle Noodles.
Placing the chicken katsu on top of the miso ramen was my husband’s idea, and I have to admit that that did look quite lovely. I unfortunately could not create a gluten-free version of this. My attempt with almond flour breading did not work in the slightest. I might try a pork rind variant later, and if it works, I will update.
- Three strips of bacon (or fry up the whole pack and reserve the bacon grease and chop up three strips)
- One yellow onion diced
- 6 cloves garlic minced
- 1 cup thin sliced mushrooms (I could only get white button mushrooms from my grocery but if you have a better selection, you could do a shitake or maitake or some other type for a little more distinctness in flavor)
- 1 tbsp ginger thinly sliced (you can also purchase crushed ginger in a tube from most supermarkets)
- 8 cups chicken broth or vegetable broth (you may need to increase the spices if you use vegetable broth)
- 2 cups of water
- ¼ cup soy sauce
- ½ tsp red pepper
- ½ tsp pepper
- ¼ cup white miso paste
- 2 tablespoons chili paste
- 4 cups spinach/greens
- 2 boxes of ramen
- Salt to taste
- Green onions thinly sliced
- Nori sheets (you can get some for sushi that are prepared so that you can just fold them so that they break off into nice even pieces)
- 4 soft-boiled eggs
Fry up the bacon. Save a couple tablespoons of the grease. You can do this in the pot you’re going to make the ramen in (which is what I did). If you use it in a skillet, transfer a couple tablespoons of grease. You want just enough to brown the onion, garlic, and mushrooms.
Add the onion, garlic, mushrooms, and ginger into the grease and brown. Chop up three slices of the bacon and add back into the pot.
Add broth and water. Bring to a boil.
Whisk in the chili paste, miso paste, and spices.
Reduce heat to medium low.
Add spinach.
Simmer for at least 20 minutes.
Add ramen noodles approximately 5 -7 minutes before serving. (Check the package of your ramen to make sure it doesn’t have a different time.)
Serve. Then add a rectangle of the nori sheet and the soft-boiled eggs and garnish with green onions.
Added Note: To prepare soft-boiled eggs, bring a large pot of water to a boil. Using a slotted spoon, lower eggs into the water. Boil for 7 minutes. Remove with a slotted spoon and place directly in a large bowl of ice water. Once they are cooled thoroughly, peel and slice lengthwise. You can prepare these the night before and refrigerate as well.
Crispy Contemplative Chicken Katsu (Let Your Thoughts Carry You Away While You Fry)
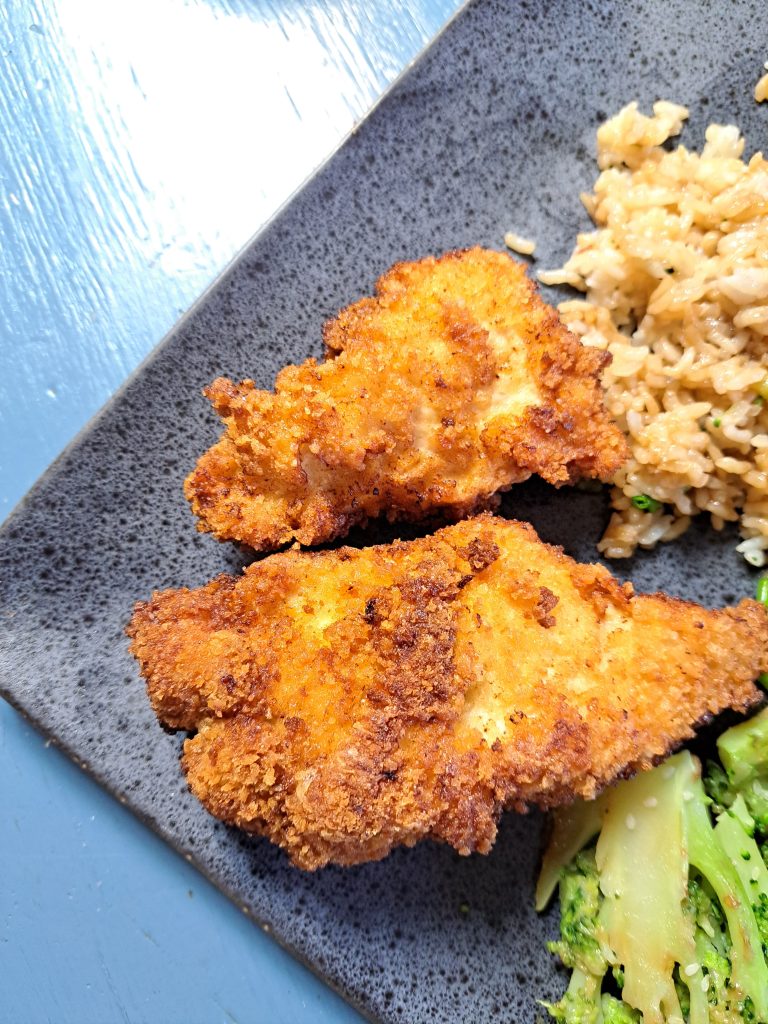
Chicken katsu is one of my favorites, and it seemed like the perfect addition to this menu. In general, I enjoy frying because it can be a rather peaceful and meditative process (as long as you don’t dip your hand in the oil). It’s always a bit of a time investment, but I love how much joy it brings. The one thing I would recommend in addition to the standards is to have a splatter screen so that you can cover it and catch most of the splatters.
It also makes me smile to know that pretty much every culture has some variation of fried bread and fried meat.
So while this is a very basic recipe, hopefully it brings you a lot of joy.
- 4 chicken breasts
- Flour
- Salt
- Pepper
- 4 eggs beaten
- Panko bread crumps (I used unseasoned but you can adjust the spices and salt if you go for seasoned)
- Oil for frying (peanut oil is my preference when possible)
- Tonkatsu sauce or something similar if you like to dip your chicken katsu in something (optional)
Set up your bowls for dredging and dipping first. Put the flour for dredging in a bowl with approximately 1 tsp salt and ¼ tsp pepper. Put the beaten eggs in another. Put the panko bread crumbs in a third.
Using a meat tenderizer, even out the chicken breasts and then cut into two or four pieces each.
Dredge in the flour, then shake off the excess. Dip into the beaten eggs. Then press into the panko bread crumbs. Coat thoroughly. Place on plate and allow to sit for a few minutes to give the panko bread crumbs time to adhere.
Heat oil in skillet over medium temperature. When the oil is hot (it should pop if you drop a little sprinkle of water), add the chicken. Do not overcrowd the pan.
Fry approximately 4 – 5 minutes on each side, sprinkling lightly with salt and pepper. It should be golden brown on both sides. If it is not done, keep frying. The internal temperature should be 165 degrees.
Place on paper towels to drain off excess oil.
Sassy Savory Sesame Seed Garlic Broccoli (Because I Am Always Looking for Fun New Ways to Cook Broccoli)
One of my all-time favorite vegetables is broccoli. I am not certain whether Touma would like this broccoli recipe. Perhaps. I feel like Yumi would like it more.
But this does combine one of my other favorite ingredients: garlic. Now, traditionally speaking, garlic is not as common an element in Japanese dishes as some other spices and such. But as this is a fantasy-based Japanese world, I think that it could make a minor appearance.
This is quick and easy, and I loved it with Crispy Contemplative Chicken Katsu.
- 2 fresh broccoli heads cut into florets or 1 bag microwaveable steamable broccoli
- 2 tbsp avocado oil
- 2 tsp soy sauce
- 3 large cloves of garlic minced
- 1 tablespoon sesame seeds
- Pinch of black pepper
- Salt to taste
Preheat oven to 425.
Bring large pot of water to a boil. If you like your broccoli salty, go ahead and salt the water. Usually I do (especially when blanching vegetables), but for this recipe, I actually preferred it without the salt in the water because of the saltiness of soy sauce. But that’s your call.
Once the broccoli is bright green, remove. If you are doing the microwave track, then only microwave for three quarters of the time on the package. (If it is overcooked, it may get a little softer and mushier, but the flavor isn’t bad).
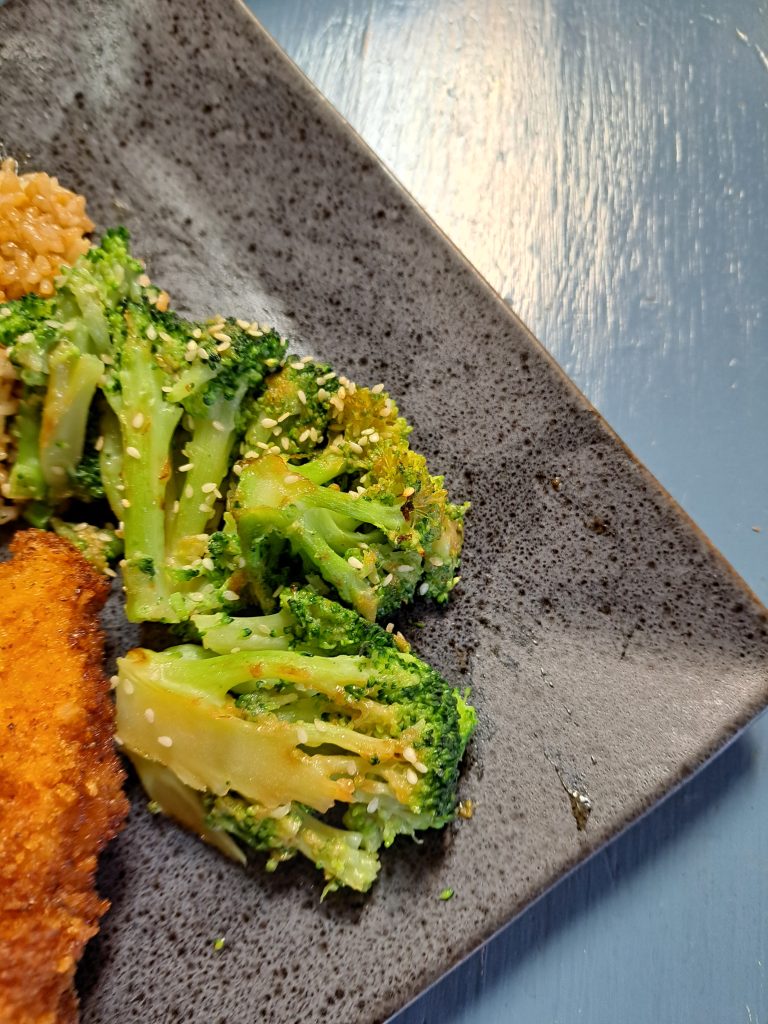
Place oil in skillet. Once hot, add garlic. If you prefer your sesame seeds toasted, add them once the garlic is soft or golden. (This last rendition of the recipe, I tried out untoasted and I think I prefer toasted though I do like the contrast in color in the picture.)
Mix the oil, soy sauce, and pepper together. If too thick, add a little water and mix thoroughly.
Line a cookie sheet with foil or parchment paper. Put the broccoli on it.
Drizzle sauce over the broccoli or brush on. (You could also put the broccoli in the skillet and toss in the sauce before placing on the cookie sheet.) Then sprinkle with salt if so desired.
Toast in oven for 5 minutes or until lightly crisped. (You can toast it for longer if you prefer it even more crispy. If your broccoli is too soggy from overcooking, you may need to go longer.)
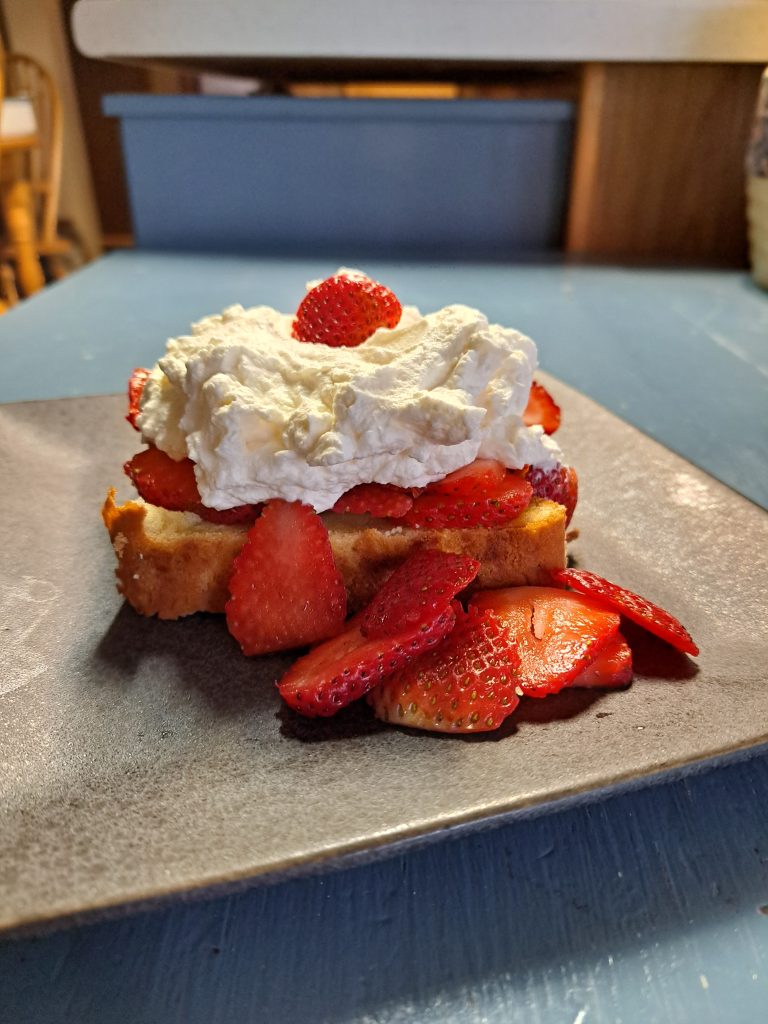
Yumi’s Yummy Strawberry Shortcake (Doesn’t She Seem Like She’d Have the Perfect Recipe for This?)
So this one comes with a fun little story. After reading this story, it struck to me that Yumi is the sort who would enjoy strawberries, and I knew from some friends that strawberry shortcake is somewhat popular in Japan. I also knew just enough to know that Japanese strawberry shortcake is different from American.
Ah. We’re off to a good start, are we not? It seemed perfect!
So I asked those friends what they would recommend, and one sweet friend who loves baking told me I could use her recipe though she has asked to remain anonymous. Where it gets funny is that in the initial discussion, she just said the primary distinction is that Japanese shortcake is not as sweet as American. Which makes sense. American food tends to be much sweeter than most of the rest of the world.
However, I discovered that there was one other crucial distinction, LOL. Japanese shortcake incorporates a meringue. Unlike the American shortcake I grew up with which is really more like fluffy buttery flaky biscuits.
That said, it is delicious, and I am deeply grateful to my dear friend for sharing this. It was so much fun, but if there is any recipe that is going to show you how inept of a baker I am, it’s going to be this one. Thank goodness for these bright and colorful berries and the homemade whipped cream. On the plus side, it did turn out delicious, and I love the flavor. It’s mildly sweet and a little more eggy in flavor compared to American shortcake, but it pairs beautifully with fresh strawberries and cream.
Shortcake
- 3/4 cups flour
- 6 tablespoons melted butter
- 1/4 cup milk
- 1/2 tsp vanilla extract
- Pinch of salt
- 6 eggs (yolks separated carefully from whites)
- 1/2 cup sugar
- ½ tsp vanilla (some traditional Japanese recipes do not use vanilla, but I preferred it with the vanilla)
Preheat oven to 325.
Chill the mixing bowl for the meringue.
Grease and flour a 5 x 9 loaf pan.
Mix together flour with butter, milk, and vanilla.
Work in egg yolks until thoroughly incorporated. Avoid overmixing.
In separate steel bowl on low speed, whisk egg whites for 30 seconds. Then add the sugar. Whisk until stiff peaks form.
Fold the meringue into the batter and work into the batter. Do not overmix.
Pour into greased loaf pan.
Bake for 45 minutes or until golden brown with a springy top.
Allow to cool completely before removing from the pan.
Slice and serve with sliced strawberries and whipped cream.
Whipped Topping (if you want to make your own rather than using cool whip or something similar)
- 1 cup heavy (whipping) cream
- 1 tsp sugar (more if you prefer sweeter)
- 1 tsp vanilla
Chill the bowl and whisk before using.
Whisk the cream in chilled bowl until frothy.
Add sugar and vanilla. Add more sugar if you want it to be sweeter.
Beat until soft peaks form (approximately 3 minutes, perhaps longer, depending on speed and strength of mixer).
Yokai Punch (Flexible and Strong)
So this is another dual recipe. You can leave the alcohol out or add it in, depending on your preferences. You might need to adjust the proportions for your tastes though.
Clearly I am not a mixologist. This is just about fun, LOL.
So. The non alcoholic version?
Equal parts pink grapefruit juice and green tea with a drizzle of honey if you prefer your drinks a little sweeter. Garnish with a slice of grapefruit.
For the alcoholic version, add a couple ounces of saki, depending on how strong you like your alcohol content.
Now you might be noticing in this picture….Jess, that looks really yellow for grapefruit juice. Well, that’s not just you or my filters. See, I live in a very rural area (in case you can’t tell by the other ingredients I can’t find), and I don’t often get into the city. I was actually shocked my Walmart stocked a little saki (though I am sure all the saki connoisseurs are about to die, but legit, this is the only real place we have for groceries for a decent bit). And I originally tested the recipe out with pink grapefruit, a little local honey, and green tea. I did not take pictures of that one, but I did love the flavor combination.
Unfortunately for me though, between the time of testing and multiple smoothies for my sweetheart who also enjoys some tasty pink grapefruit, every place within driving distance was out. So I tried out pineapple juice. And that’s what you see in this picture. And that’s where the flexible part of this comes in because, LOL, I don’t think you can get much more flexible than switching from grapefruit to pineapple.
That said, I did think it worked well. It just didn’t go as planned. So we have flexible Yokai Punch indeed. After the store stocks pink grapefruit juice again, I will pick some up and add a new picture as it really was quite lovely.


0 Comments